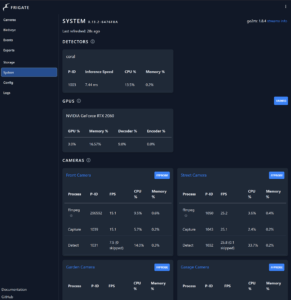
Frigate, an open-source NVR (Network Video Recorder) with real-time AI object detection, leverages GPUs and Coral USB sticks to enhance the performance of AI models, especially for object detection in video streams. This guide will walk you through setting up GPU and Coral USB passthrough on a Proxmox LXC container to optimize Frigate’s performance.
This post may contain affiliate links which means I receive a commission for purchases made through links. I only recommend products that I personally use! Learn more on my private policy page.

Below is an explanation of the purpose of each hardware component:
GPU (Graphics Processing Unit)
- Accelerating AI inference: A GPU can speed up computations for AI models by using parallel processing. This is particularly useful for performing complex tasks such as object detection in video streams.
- Higher processing speed: With a GPU, Frigate can process multiple video streams in real-time, resulting in faster and more efficient object detection.
- Reducing CPU load: By offloading AI tasks to the GPU, the CPU remains available for other tasks, improving overall system performance.
Coral USB Accelerator
- Edge TPU processing: The Coral USB Accelerator contains a Tensor Processing Unit (TPU) specifically designed for AI inference, allowing efficient execution of AI models with low power consumption.
- Real-time object detection: The Coral USB Accelerator can speed up Frigate’s AI models, enabling real-time object detection even on systems with limited computing power.
- Easy integration: The Coral USB Accelerator is easy to integrate with existing systems via a USB port, providing a convenient solution for enhancing AI performance without the need for a dedicated GPU.
Why do we need Passthrough?
A GPU and Coral TPU need to be passed through to a Proxmox server to provide hardware acceleration from an LXC container because LXC containers do not have direct access to the host hardware by default. This allows the container to use the GPU and TPU for intensive computations, such as AI inference for object detection in a Frigate server. Without passthrough, the container would only be able to use the CPU, which is much less efficient for such tasks.
First step is to install the drivers on the host
Nvidia has an official Debian repo that we could use. However, that introduces a potential problem; we need to install the drivers on the LXC container later without kernel modules. I could not find a way to do this using the packages within the official Debian repo, and therefore had to install the drivers manually within the LXC container. The other aspect is that both the host and the LXC container need to run the same driver version (or else it won’t work). If we install using the official Debian repo on the host, and manually install the driver on the LXC container, we could easily end up with different versions (whenever you do an apt upgrade on the host). To keep this as consistent as possible, we’ll install the driver manually on both the host and within the LXC container.
Let’s do it!
Configuring the Proxmox Host
Log in to the Proxmox host with SSH.
First, run lspci -v to check the type of your Nvidia card. For me, this is: GeForce RTX 2060 Rev. A.
We will go through four steps:
- Deactivate the Nouveau driver: The Nouveau driver must be disabled first because loading both the Nouveau driver and the proprietary NVIDIA driver simultaneously can cause conflicts, making the NVIDIA driver possibly not work correctly.
- Prepare the system to compile and install the new driver
- Install the new Nvidia driver
- Enable the NVIDIA drivers: After disabling the Nouveau driver, restarting the system, and installing the new drivers, the NVIDIA driver configuration can be set up. By specifying the NVIDIA modules and updating the initramfs, it ensures that the correct drivers are loaded during startup.
The process ensures a seamless transition from the open-source driver to the proprietary driver, avoiding compatibility issues, and allowing the NVIDIA GPU to function correctly with optimized drivers.
Deactivating the Nouveau driver:
Now disable the open-source Nvidia Nouveau driver on the host.
Nouveau is an open-source graphics driver for NVIDIA video cards.
The following series of commands is used to disable the Nouveau driver, update the initramfs to include this change, and restart the system to make the changes effective. This is a common procedure when installing proprietary NVIDIA drivers on a Linux system.
# Disable the Nouveau driver
echo -e "blacklist nouveau\noptions nouveau modeset=0" | sudo tee /etc/modprobe.d/blacklist-nouveau.conf
# Update the initramfs
sudo update-initramfs -u
# Reboot the system
reboot
Preparing the system to compile and install the new driver
The following command installs the Proxmox Virtual Environment (PVE) kernel headers that match the current kernel running on your system.
Why are kernel headers important? Kernel headers are needed when compiling kernel modules, such as custom drivers or other extensions that need to work closely with the kernel. They contain the necessary header files and symbols that the source code needs to compile and function correctly with the specific kernel version.
apt install pve-headers-$(uname -r)
The following command installs tools and libraries needed for building, compiling, and running the Nvidia driver, which uses C/C++ code (GNU Compiler Collection) and Vulkan graphics (a cross-platform API for 3D graphics and rendering). It provides the essential building blocks needed to build drivers and offer GPU support, and eventually passthrough to the LXC container.
sudo apt-get install make gcc libvulkan1 pkg-config
Installing the new Nvidia driver
Download the latest Nvidia driver from https://www.nvidia.com/download/index.aspx
Fill in the Product Type (GeForce), Product Series (GeForce RTX 20 Series), Product (GeForce RTX 2060), OS (Linux 64-bit), Download Type (Production Branch), and Language (English) on the site.
Do not download the driver, but copy the download link. Adjust the copied download link so it looks like mine as shown below:
wget https://download.nvidia.com/XFree86/Linux-x86_64/550.78/NVIDIA-Linux-x86_64-550.78.run
chmod +x NVIDIA-Linux-x86_64-550.78.run
Install the new Nvidia driver:
sudo ./NVIDIA-Linux-x86_64-550.78.run --no-questions --disable-nouveau
Skip secondary cards, No 32 bits, No X.
Enabling the NVIDIA drivers using udev rules
To ensure the correct drivers are loaded at reboot, apply the following commands:
echo -e '\n# load nvidia modules\nnvidia\nnvidia_uvm\nnvidia-drm\nnvidia-uvm' | sudo tee /etc/modules-load.d/modules.conf
sudo update-initramfs -u -k all
Edit the udev rules:
sudo nano /etc/udev/rules.d/70-nvidia.rules
Add the following lines to this file:
KERNEL=="nvidia", RUN+="/bin/bash -c '/usr/bin/nvidia-smi -L && /bin/chmod 666 /dev/nvidia*'"
KERNEL=="nvidia_uvm", RUN+="/bin/bash -c '/usr/bin/nvidia-modprobe -c0 -u && /bin/chmod 0666 /dev/nvidia-uvm*'"
SUBSYSTEM=="module", ACTION=="add", DEVPATH=="/module/nvidia", RUN+="/usr/bin/nvidia-modprobe -m"
To prevent the Nvidia driver/kernel files from stopping when the GPU is not in use, install the Nvidia persistence service. It became available to us after we installed the new drivers.
sudo cp /usr/share/doc/NVIDIA_GLX-1.0/samples/nvidia-persistenced-init.tar.bz2 .
tar -xjf nvidia-persistenced-init.tar.bz2
# Remove old, if any (to avoid masked service)
rm /etc/systemd/system/nvidia-persistenced.service
# Install
sudo ./nvidia-persistenced-init/install.sh
systemctl status nvidia-persistenced.service
# Check if okay!?
systemctl status nvidia-persistenced.service
rm -rf nvidia-persistenced-init*
If you have reached this point without errors, you are ready to reboot the Proxmox host. After the reboot, we will check if the Nvidia driver is installed correctly.
sudo reboot
nvidia-smi
Expected Output:
Sat May 18 16:37:51 2024
+-----------------------------------------------------------------------------------------+
| NVIDIA-SMI 550.78                 Driver Version: 550.78         CUDA Version: 12.4     |
|-----------------------------------------+------------------------+----------------------+
| GPU  Name                 Persistence-M | Bus-Id          Disp.A | Volatile Uncorr. ECC |
| Fan  Temp   Perf          Pwr:Usage/Cap |           Memory-Usage | GPU-Util  Compute M. |
|                                         |                        |               MIG M. |
|=========================================+========================+======================|
|   0  NVIDIA GeForce RTX 2060        On  |   00000000:09:00.0 Off |                  N/A |
| 55%   56C    P2             44W /  170W |     794MiB /   6144MiB |      3%      Default |
|                                         |                        |                  N/A |
+-----------------------------------------+------------------------+----------------------+
+-----------------------------------------------------------------------------------------+
| Processes:                                                                              |
|  GPU   GI   CI        PID   Type   Process name                              GPU Memory |
|        ID   ID                                                               Usage      |
|=========================================================================================|
|    0   N/A  N/A      6906      C   ffmpeg                                        186MiB |
|    0   N/A  N/A      6910      C   ffmpeg                                        109MiB |
|    0   N/A  N/A      6917      C   ffmpeg                                        121MiB |
|    0   N/A  N/A      6921      C   ffmpeg                                        186MiB |
|    0   N/A  N/A      6926      C   ffmpeg                                        186MiB |
+-----------------------------------------------------------------------------------------+
systemctl status nvidia-persistenced.service
Expected Output:
nvidia-persistenced.service - NVIDIA Persistence Daemon
     Loaded: loaded (/lib/systemd/system/nvidia-persistenced.service; enabled; vendor preset: enabled)
     Active: active (running) since Sat 2024-05-18 15:45:11 CEST; 53min ago
    Process: 1155 ExecStart=/usr/bin/nvidia-persistenced --user nvidia-persistenced (code=exited, status=0/SUCCESS)
   Main PID: 1160 (nvidia-persiste)
      Tasks: 1 (limit: 38353)
     Memory: 1.1M
        CPU: 588ms
     CGroup: /system.slice/nvidia-persistenced.service
             └─1160 /usr/bin/nvidia-persistenced --user nvidia-persistenced
May 18 15:45:11 pve systemd[1]: Starting NVIDIA Persistence Daemon...
May 18 15:45:11 pve nvidia-persistenced[1160]: Started (1160)
May 18 15:45:11 pve systemd[1]: Started NVIDIA Persistence Daemon.ls -alh /dev/nvidia*Expected Output:
crw-rw-rw- 1 root root 195,   0 May 18 15:45 /dev/nvidia0
crw-rw-rw- 1 root root 195, 255 May 18 15:45 /dev/nvidiactl
crw-rw-rw- 1 root root 195, 254 May 18 15:45 /dev/nvidia-modeset
crw-rw-rw- 1 root root 506,   0 May 18 15:45 /dev/nvidia-uvm
crw-rw-rw- 1 root root 506,   1 May 18 15:45 /dev/nvidia-uvm-tools
/dev/nvidia-caps:
total 0
drwxr-xr-x  2 root root     80 May 18 15:45 .
drwxr-xr-x 21 root root   4.8K May 18 15:45 ..
cr--------  1 root root 234, 1 May 18 15:45 nvidia-cap1
cr--r--r--  1 root root 234, 2 May 18 15:45 nvidia-cap2
If you see the correct GPU from nvidia-smi, the persistence service running well, and all five files are present, you are ready to configure the LXC container from the Proxmox host.
Configuring the LXC Container
We need to add relevant LXC configuration to our container. Shut down the LXC container, and make the following changes to the LXC configuration file:
Edit /etc/pve/lxc/1xx.conf and add the following:
lxc.cgroup2.devices.allow: c 195:* rwm
lxc.cgroup2.devices.allow: c 506:* rwm
lxc.cgroup2.devices.allow: c 509:* rwm
lxc.cgroup2.devices.allow: c 511:* rwm
lxc.mount.entry: /dev/nvidia0 dev/nvidia0 none bind,optional,create=file
lxc.mount.entry: /dev/nvidiactl dev/nvidiactl none bind,optional,create=file
lxc.mount.entry: /dev/nvidia-modeset dev/nvidia-modeset none bind,optional,create=file
lxc.mount.entry: /dev/nvidia-uvm dev/nvidia-uvm none bind,optional,create=file
lxc.mount.entry: /dev/nvidia-uvm-tools dev/nvidia-uvm-tools none bind,optional,create=file
The numbers on the cgroup2 lines are from the fifth column in the device list above (via ls -alh /dev/nvidia*).
Example Output:
ls -alh /dev/nvidia*
crw-rw-rw- 1 root root 195,   0 May 18 01:57 /dev/nvidia0
crw-rw-rw- 1 root root 195, 255 May 18 01:57 /dev/nvidiactl
crw-rw-rw- 1 root root 195, 254 May 18 01:57 /dev/nvidia-modeset
crw-rw-rw- 1 root root 506,   0 May 18 01:57 /dev/nvidia-uvm
crw-rw-rw- 1 root root 506,   1 May 18 01:57 /dev/nvidia-uvm-tools
/dev/nvidia-caps:
total 0
drwxr-xr-x  2 root root     80 May 18 01:57 .
drwxr-xr-x 21 root root   4.8K May 18 01:57 ..
cr--------  1 root root 234, 1 May 18 01:57 nvidia-cap1
cr--r--r--  1 root root 234, 2 May 18 01:57 nvidia-cap2
For me, the two nvidia-uvm files change randomly between 509 and 511, while the three others remain static as 195. I don’t know why they alternate between the two values, but LXC does not complain if you configure numbers that don’t exist (i.e. we can add all three of them to make sure it works).
We can now turn on the LXC container and install the Nvidia driver. This time, we will install it without the kernel drivers, and there is no need to install the kernel headers.
Next, to make a passthrough for the Nvidia Card, we also want to passthrough a Coral USB Stick.
For more help, I’ve found a script from https://community.home-assistant.io/t/google-coral-usb-frigate-proxmox/383737/28:
bash -c "$(wget -qLO - https://github.com/tteck/Proxmox/raw/main/misc/frigate-support.sh)" -s 106
Change the LXC id 106 to your own LXC id. For me, it is 101.
This is the script (all kudos go to tteck (tteckster)):
#!/usr/bin/env bash
# Copyright (c) 2021-2023 tteck
# Author: tteck (tteckster)
# License: MIT
# https://github.com/tteck/Proxmox/raw/main/LICENSE
echo -e "\e[1;33m This script will Prepare a LXC Container for Frigate \e[0m"
while true; do
  read -p "Did you replace 106 with your LXC ID? Proceed (y/n)?" yn
  case $yn in
  [Yy]*) break ;;
  [Nn]*) exit ;;
  *) echo "Please answer yes or no." ;;
  esac
done
set -o errexit
set -o errtrace
set -o nounset
set -o pipefail
shopt -s expand_aliases
alias die='EXIT=$? LINE=$LINENO error_exit'
trap die ERR
trap cleanup EXIT
function error_exit() {
  trap - ERR
  local DEFAULT='Unknown failure occured.'
  local REASON="\e[97m${1:-$DEFAULT}\e[39m"
  local FLAG="\e[91m[ERROR] \e[93m$EXIT@$LINE"
  msg "$FLAG $REASON"
  exit $EXIT
}
function msg() {
  local TEXT="$1"
  echo -e "$TEXT"
}
function cleanup() {
  popd >/dev/null
  rm -rf $TEMP_DIR
}
TEMP_DIR=$(mktemp -d)
pushd $TEMP_DIR >/dev/null
CHAR_DEVS+=("1:1")
CHAR_DEVS+=("29:0")
CHAR_DEVS+=("188:.*")
CHAR_DEVS+=("189:.*")
CHAR_DEVS+=("226:0")
CHAR_DEVS+=("226:128")
for char_dev in ${CHAR_DEVS[@]}; do
  [ ! -z "${CHAR_DEV_STRING-}" ] && CHAR_DEV_STRING+=" -o"
  CHAR_DEV_STRING+=" -regex \".*/${char_dev}\""
done
read -r -d '' HOOK_SCRIPT <<-EOF || true
for char_dev in \$(find /sys/dev/char -regextype sed $CHAR_DEV_STRING); do
  dev="/dev/\$(sed -n "/DEVNAME/ s/^.*=\(.*\)$/\1/p" \${char_dev}/uevent)";
  mkdir -p \$(dirname \${LXC_ROOTFS_MOUNT}\${dev});
  for link in \$(udevadm info --query=property \$dev | sed -n "s/DEVLINKS=//p"); do
    mkdir -p \${LXC_ROOTFS_MOUNT}\$(dirname \$link);
    cp -dpR \$link \${LXC_ROOTFS_MOUNT}\${link};
  done;
  cp -dpR \$dev \${LXC_ROOTFS_MOUNT}\${dev};
done;
EOF
HOOK_SCRIPT=${HOOK_SCRIPT//$'\n'/}
CTID=$1
CTID_CONFIG_PATH=/etc/pve/lxc/${CTID}.conf
sed '/autodev/d' $CTID_CONFIG_PATH >CTID.conf
cat CTID.conf >$CTID_CONFIG_PATH
cat <<EOF >>$CTID_CONFIG_PATH
lxc.autodev: 1
lxc.hook.autodev: bash -c '$HOOK_SCRIPT'
EOF
echo -e "\e[1;33m Finished....Reboot ${CTID} LXC to apply the changes \e[0m"
# In the Proxmox web shell run (replace 106 with your LXC ID)
# bash -c "$(wget -qLO - https://github.com/tteck/Proxmox/raw/main/misc/frigate-support.sh)" -s 106
# Reboot the LXC to apply the changes
If you run it, the following lines would be added to your LXC configuration:
lxc.autodev: 1
lxc.hook.autodev: bash -c 'for char_dev in $(find /sys/dev/char -regextype sed  -regex ".*/1:1" -o -regex ".*/29:0" -o -regex ".*/188:.*" -o -regex ".*/189:.*" -o -regex ".*/226:0" -o -regex ".*/226:128"); do  dev="/dev/$(sed -n "/DEVNAME/ s/^.*=\(.*\)$/\1/p" ${char_dev}/uevent)";  mkdir -p $(dirname ${LXC_ROOTFS_MOUNT}${dev});  for link in $(udevadm info --query=property $dev | sed -n "s/DEVLINKS=//p"); do    mkdir -p ${LXC_ROOTFS_MOUNT}$(dirname $link);    cp -dpR $link ${LXC_ROOTFS_MOUNT}${link};  done;  cp -dpR $dev ${LXC_ROOTFS_MOUNT}${dev};done;'
Configuring the Frigate LXC
We can now turn on the LXC container and install the Nvidia driver. This time, we’re going to install it without the kernel drivers, and there is no need to install the kernel headers.
Answer “no” when it asks if it should also install drivers for your secondary Nvidia card (I use 2 video cards, one as Frigate GPU (passthrough) and one as ProxMox Video card (no passthrough)).
Log in with SSH to the Frigate LXC.
Install Nvidia driver without kernel drivers or kernel headers. Answer “no” when it asks if it should update X config, and “no” when it asks if it should install 32-bit drivers.
wget  https://download.nvidia.com/XFree86/Linux-x86_64/550.78/NVIDIA-Linux-x86_64-550.78.run
chmod +x NVIDIA-Linux-x86_64-550.78.run
sudo ./NVIDIA-Linux-x86_64-550.78.run --no-kernel-module
Skip secondary cards message, No 32 bits, No X.
At this point, you should be able to reboot your LXC container. Verify that the files and driver work as expected before moving on to the Docker setup.
ls -alh /dev/nvidia*
Expected Output:
-rwxr-xr-x 1 root root        0 May 18 00:09 /dev/nvidia-caps
crw-rw-rw- 1 root root 195, 254 May 17 23:57 /dev/nvidia-modeset
crw-rw-rw- 1 root root 506,   0 May 17 23:57 /dev/nvidia-uvm
crw-rw-rw- 1 root root 506,   1 May 17 23:57 /dev/nvidia-uvm-tools
crw-rw-rw- 1 root root 195,   0 May 17 23:57 /dev/nvidia0
crw-rw-rw- 1 root root 195,   1 May 18 00:09 /dev/nvidia1
crw-rw-rw- 1 root root 195, 255 May 17 23:57 /dev/nvidiactlnvidia-smiExpected Output:
Sat May 18 13:28:43 2024
+-----------------------------------------------------------------------------------------+
| NVIDIA-SMI 550.78                 Driver Version: 550.78         CUDA Version: 12.4     |
|-----------------------------------------+------------------------+----------------------+
| GPU  Name                 Persistence-M | Bus-Id          Disp.A | Volatile Uncorr. ECC |
| Fan  Temp   Perf          Pwr:Usage/Cap |           Memory-Usage | GPU-Util  Compute M. |
|                                         |                        |               MIG M. |
|=========================================+========================+======================|
|   0  NVIDIA GeForce RTX 2060        Off |   00000000:09:00.0 Off |                  N/A |
| 55%   57C    P2             44W /  170W |     794MiB /   6144MiB |      3%      Default |
|                                         |                        |                  N/A |
+-----------------------------------------+------------------------+----------------------+
Docker Container
Now we can move on to get Docker working. We’ll be using docker-compose, and we’ll also make sure to have the latest version by removing the Debian-provided Docker and docker-compose. We’ll also install the Nvidia-provided Docker runtime. Both of these are relevant in terms of making the GPU available within Docker.
Remove Debian-provided packages
apt remove docker-compose docker docker.io containerd runc
Install Docker from the official repository
apt update
apt install ca-certificates curl gnupg lsb-release
curl -fsSL https://download.docker.com/linux/debian/gpg | gpg --dearmor -o /usr/share/keyrings/docker-archive-keyring.gpg
echo \
  "deb [arch=$(dpkg --print-architecture) signed-by=/usr/share/keyrings/docker-archive-keyring.gpg] https://download.docker.com/linux/debian \
  $(lsb_release -cs) stable" | tee /etc/apt/sources.list.d/docker.list > /dev/null
apt update
apt install docker-ce docker-ce-cli containerd.io
Install Docker Compose:
curl -L "https://github.com/docker/compose/releases/download/1.29.2/docker-compose-$(uname -s)-$(uname -m)" -o /usr/local/bin/docker-compose
chmod +x /usr/local/bin/docker-compose
Install Docker Compose bash completion:
curl \
    -L https://raw.githubusercontent.com/docker/compose/1.29.2/contrib/completion/bash/docker-compose \
    -o /etc/bash_completion.d/docker-compose
Install Nvidia Docker 2:
apt install -y curl
distribution=$(. /etc/os-release;echo $ID$VERSION_ID)
keyring_file="/usr/share/keyrings/nvidia-container-toolkit-keyring.gpg"
curl -fsSL https://nvidia.github.io/libnvidia-container/gpgkey | gpg --dearmor -o ${keyring_file}
curl -s -L https://nvidia.github.io/libnvidia-container/$distribution/libnvidia-container.list | \
  sed "s#deb https://#deb [signed-by=${keyring_file}] https://#g" | \
  tee /etc/apt/sources.list.d/nvidia-container-toolkit.list
apt update
apt install nvidia-docker2
Restart systemd and Docker:
systemctl daemon-reload
systemctl restart docker
We should now be able to run Docker containers with GPU support. Let’s test it.
docker run --rm --gpus all nvidia/cuda:11.8.0-devel-ubuntu22.04 nvidia-smi
Expected Output:
==========
== CUDA ==
==========
CUDA Version 11.8.0
Container image Copyright (c) 2016-2022, NVIDIA CORPORATION & AFFILIATES. All rights reserved.
This container image and its contents are governed by the NVIDIA Deep Learning Container License.
By pulling and using the container, you accept the terms and conditions of this license:
https://developer.nvidia.com/ngc/nvidia-deep-learning-container-license
A copy of this license is made available in this container at /NGC-DL-CONTAINER-LICENSE for your convenience.
Sat May 18 14:45:18 2024
+-----------------------------------------------------------------------------------------+
| NVIDIA-SMI 550.78                 Driver Version: 550.78         CUDA Version: 12.4     |
|-----------------------------------------+------------------------+----------------------+
| GPU  Name                 Persistence-M | Bus-Id          Disp.A | Volatile Uncorr. ECC |
| Fan  Temp   Perf          Pwr:Usage/Cap |           Memory-Usage | GPU-Util  Compute M. |
|                                         |                        |               MIG M. |
|=========================================+========================+======================|
|   0  NVIDIA GeForce RTX 2060        Off |   00000000:09:00.0 Off |                  N/A |
| 55%   57C    P2             44W /  170W |     794MiB /   6144MiB |      3%      Default |
|                                         |                        |                  N/A |
+-----------------------------------------+------------------------+----------------------+
+-----------------------------------------------------------------------------------------+
| Processes:                                                                              |
|  GPU   GI   CI        PID   Type   Process name                              GPU Memory |
|        ID   ID                                                               Usage      |
|=========================================================================================|
+-----------------------------------------------------------------------------------------+
Testing Everything Works
An easy way to test everything is working is to add a FileFlows container.
Create a docker-compose.yml file:
nano docker-compose.yml
Add the following content:
version: '3.7'
services:
  fileflows:
    image: revenz/fileflows
    container_name: fileflows
    runtime: nvidia
    stdin_open: true # docker run -i
    tty: true        # docker run -t
    environment:
      - TZ=Pacific/Auckland
      - TempPathHost=/temp
      - NVIDIA_DRIVER_CAPABILITIES=compute,video,utility
      - NVIDIA_VISIBLE_DEVICES=all
    volumes:
      - /var/run/docker.sock:/var/run/docker.sock:ro
      - /mnt/docker/fileflows/data:/app/Data
      - /mnt/docker/fileflows/logs:/app/Logs
      - /mnt/docker/fileflows/temp:/temp
    ports:
      - 19200:5000
    restart: unless-stopped
Run the container:
docker-compose up
Run an ffmpeg Nvidia test:
ffmpeg -loglevel error -f lavfi -i color=black:s=1920x1080 -vframes 1 -an -c:v hevc_nvenc -f null -If the command completes without error, you are ready to install Frigate! See Best Way to Boost Frigate with Google Coral / Nvidia Easily.
Price Range of the Google Coral USB stick in the Netherlands
In the Netherlands, the Google Coral USB TPU typically sells for around €60 to €80. While this may seem steep, the performance boost and energy efficiency it provides make it a worthwhile investment for any serious home lab enthusiast or AI developer. If you want to support me, and you are from the Netherlands, please buy via this link (Google Coral TPU on Amazon.nl) from Amazon.nl.

Conclusion
Setting up GPU and Coral USB passthrough on a Proxmox LXC container significantly enhances the performance of Frigate by offloading intensive AI computations from the CPU. This guide provided a step-by-step process to configure your Proxmox host and LXC container, ensuring efficient real-time object detection in your video surveillance setup.
Have fun with it!
Buy the Google Coral USB TPU on Amazon
Copyright © 2023 Sluijsjes Tech Lab


Wow! What a long road to get there! Thanks for the blog!
You are seriously awesome for taking the time to make this guide!! I used it to set up GPU passthrough to my plex server running in a PVE LXC. Thank you 🙂